
Thanks to Lindsay B. for today’s post!
Escape Rooms burst onto the scene a few years ago and have grown in popularity with many different ages & genres. Escape Rooms are a fun filled activity that you can tailor to any topic – proving perfect for Bible adaptions to use to re-enforce a lesson or become a stand alone activity at Bible school or an ecclesial event.
After witnessing a high energy Escape Room at Manitoulin Kids Camp a couple years ago – where the young people had to attempt to “free the speaker”, we decided that it would be fun to try to make one for Ontario Winter Bible School.
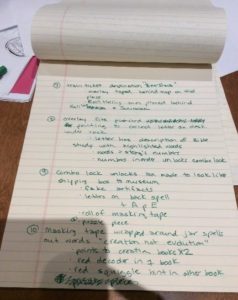
 Our first attempt proved very educational! Scoring various resources, including Pinterest, helped us to come up with 27 different clues, grouped into 12 main clues. An article that we read instructed the importance of fake clues – however we discovered that year that making an equal amount of fake clues is just too much, next time we will only include perhaps 6.
Setting the scene and story line is important – time spent on gathering and sourcing props is time well spent!
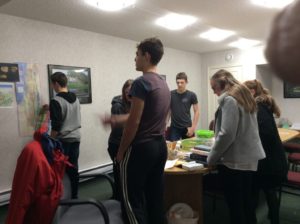
We decided to set the scene of an archaeologist in Israel. The story line was that your boss had left tasks for you (his intern) to be completed by the end of his lunch hour. The young people were divided into 3 groups of 6 people as we had 3 rooms available in the same hallway. We used the children’s classrooms and used masking tape to ensure that the crafts and classroom supplies of the teachers were not disturbed. A note for dividing up teams – by coincidence we ended up with teams made up of pairs of siblings – this is not the best idea so the next year we made sure to split them up!
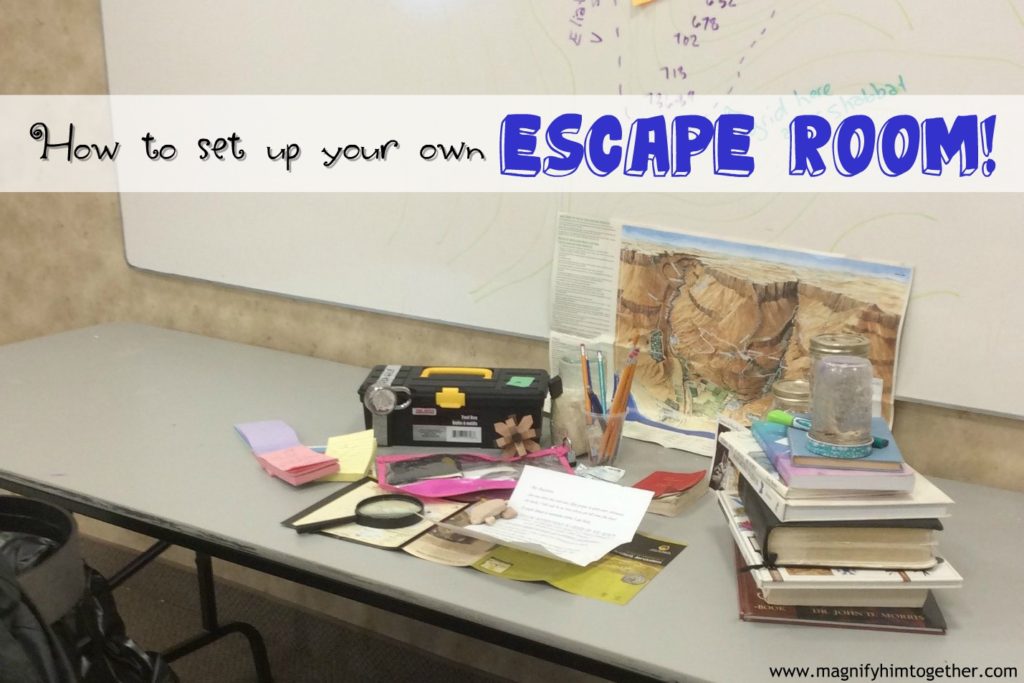
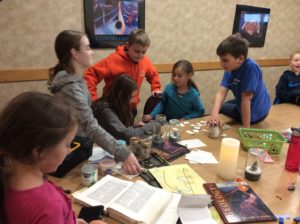
When the young people walked into the room they were faced with the scene of a table set up as the main archaeologist’s desk.
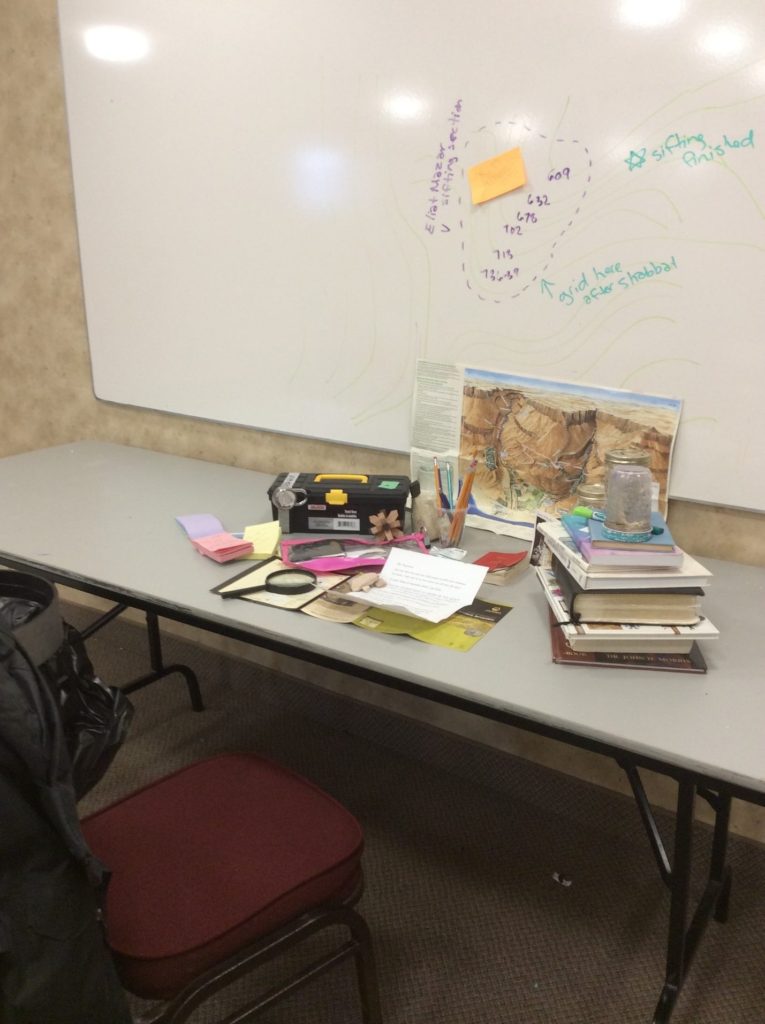
We used old books on archaeology, creation and Israel, as well as a Strong’s concordance and some Bible study books. Mason jars held a variety of pre-made artifacts such as bulla – these can be made easily and cheaply with air dry Crayola clay.
Printing out topographical maps of Jerusalem and drawing survey maps with notes written on them to Leen Ritmeyer were rubbed with damp tea bags to make them appear older. You can also wash and dry chicken bones to add into jars – something the young people thought was crazy!
We included some postcards, of which only one had a clue that was relevant, and a shopping list from his wife, printed out Israeli bus tickets and stamps that were found online as well as using coins from Israel – everything we could think of to set a realistic scene.
In the middle of the boss’ desk was a pad of paper with a letter to his student intern (the young people) with instructions – if they followed them in order it was much easier to break the codes but only one group did! To continue the theme, when the different tool boxes were opened they contained packing material and artifacts as well as the clues. One clue was written in code with one symbol/letter on the back of each artifact in the box.
For the locked boxes, padlocks on cheap dollar store tool boxes worked very well.
Posters from Israel and a map of Israel on the walls proved the perfect place to hide clues – behind and also using co-ordinates on the map for city names that matched letters needed in the riddle. One clue was “Beer-Sheva”, on the back of the map were various words, the only correct one was the one behind “Beer-Sheva”.
Some of the clues that worked the best and seemed more enjoyable then frustrating was:
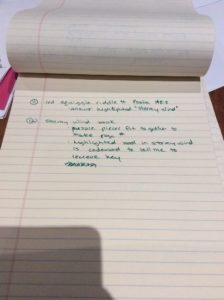
– a verse written out with individual words on each Lego block, which when put together in the correct order – using a line drawn on the back to form the correct shape – gives a number sequence needed for one of the locks.
– a riddle cut up into small puzzle piece shapes that must be made before it is solved. You can do this yourself or purchase a blank puzzle from a craft store.
– Strong’s numbers being the key to riddles that point towards verses that unlock the combination lock. This works well when you purchase combination locks which are pre-set to a numeric code and you cannot change it.
– a highlighted word in a study book… make sure to highlight extra words on different pages to make this more difficult for an older group.
– a piece of card-stock with holes cut out that corresponded to one of the many postcards on the desk. We placed the card-stock in one of the study books on the desk that was led to by other clues.
– placing a key to the lock on a key-ring with other keys in the pocket of a coat on the back of a chair – hidden in plain sight.
– taping one of the needed numbers or clues to the bottom of the table or chair.
– locked see-through pencil case with a bogus site map, clue, and Lego piece and puzzle piece needed for other clues.
– clues behind the posters and maps
– option of a hint needed 3 times
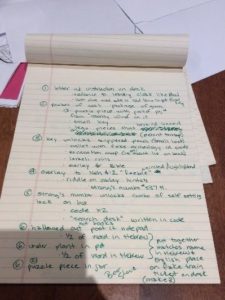
Creating an escape room yourself is very enjoyable! We would suggest that you come up with a list of 20-30 clues (we used 27, you can see our plan above) and make a chart of two different paths to the correct and final clue. This serves to not only slow them down but also can be used when a group is larger so that there is something for everyone to work on. It took the young people about 1.5 hours to solve the escape room challenge, so we were glad to have allowed for extra time. Keeping this in mind, going forward we will limit it to less clues. Since we did are planning on paper, we took pictures of the instruction sheets on both a tablet and phone so ensure that they were not lost.
 We were given the advice to walk through the escape room ourselves to ensure that the clues all went together well. This is a must! In doing so we discovered a couple of the clues needed some tweaking and in one case we were missing a step! In future we will have someone try it for us that doesn’t know the answers to also get a handle on the time it will take to solve.
False clues are great – or even a doubled clue! Just ensure that in the answer it is clear that it is a false trail that they are on. Some of ours led to instructions to “play dead for five minutes”, “quake like a duck for 5 minutes”, “you must answer ‘I am Goliath’ to the next 10 phrases/questions anyone says to you” etc, use your imagination to come up with ones that match your theme, or are just amusing!
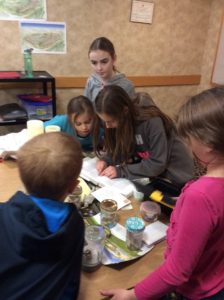
 We reused many of these elements the following day to create an escape room for the 7-11 year olds. The scene was “Daddy’s Study at home” and it started with a letter addressed to the children from Daddy & Mummy on a trip to Israel. Paring it down to 9 clues and having them work in a larger group ensured that they were able to complete the task at hand. It was interesting to observe that the children followed the instructions in order and whenever they got confused or stumped they would go back to the original clue of the letter… something the young people struggled with. They were able to solve it in 36 minutes and everyone received a chocolate bar from the final locked toolbox.
In two week’s we’ll post another great Escape Room idea!
In the meantime, read about a Samson themed Escape Room here!